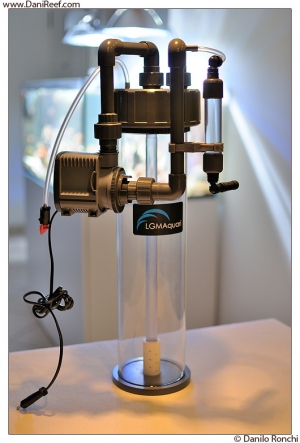
The calcium reactor LGMAquari LGr701 SP is the third reactor in a row that I’ve tried, thanks to the kindness of Geppy and Emanuela, owners of LGMAquari, who made a copy available to me to do a very thorough test.
It’s been 4 months since I installed the reactor into my tank, and now I can finally make a very thorough review.
LGMAquari declares this reactor sufficient for tanks up to 1,000 liters, and for that it includes two pumps so that the user could select the most powerful and most suitable for his own consumption into the tank. The reactor is equipped with any accessory, from the bubble counter to the probe holder, missing only the feeding pump, also if LGMAquari recommended to use a diversion from return pipe. Apart from that, the reactor is ready to use.
Technical Features:
| LGr701SP | |
| Reactor height | 600 mm |
| External pipe diameter | 120 mm |
| Internal pipe diameter | 110 mm |
| Ground diameter | 140 mm |
| Pumps | Sicce Syncra 1.5 and Sicce Syncra 2.0 |
| Height free to fill | ~ 43 cm |
| Capacity | 4,0 litri |
| Street Price (Italy Store) | 438 euro |
The reactor is in a box pretty well drowned among many triangles of polystyrene. I would say very well protected. Into the packaging you also find the two pumps, a thin but complete manual, and a product brochure LGMAquari.
The reactor was used in my new tank, which was started some time ago and now is taking off in recent months. The tank capacity is about 350 liters.
How to use it
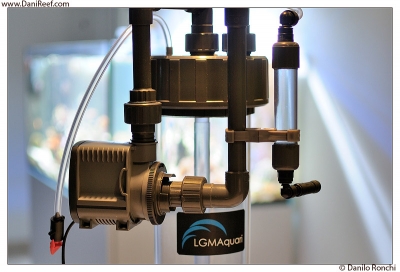
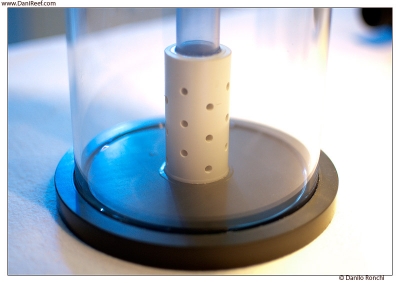
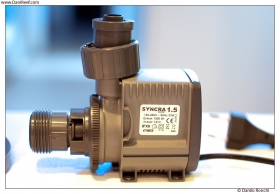
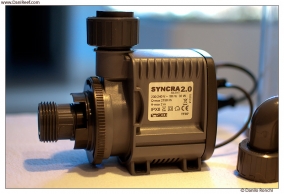
From the construction point of view, the reactor is a standard plexyglass cylinder with all pipes and connection made by PVC, placed in a classical way. The water is driven by an external pump (not included) in the circuit of the reactor recirculation pump. Recall that LGMAcquari provides two recirculation pumps, a Sicce Syncra 1.5 and Syncra 2.0, from 1350 and 2150 l / h respectively. The water enriched with CO2, is then pushed by the recirculation pump within the vertical pipe that brings water at the base of the reactor where it will be distributed by a small cylindrical diffuser.
The cylindrical diffuser
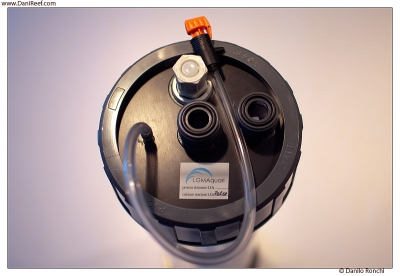
On the cover then there are the recirculation pipes that will go to the pump where engages the inlet tube from CO2 cylinder and a little plastic tube that will distribute water enriched with calcium in the tank.
The cover
Given the type of construction, the recovery of CO2 is always guaranteed thanks to the recycling. The reactor is equipped with a check valve and a tap over the outlet pipe.
Setting up
The installation of this calcium reactor is extremely simple, thanks to the manual is almost impossible to fail. The reactor is sealed and thanks to external feeding pump, it can be installed inside the sump or, if there wasn’t enough room, even outside it. I advise, however, to do not place on floor but inside a small plastic container to avoid a possible microleakage from the various John Guest fittings.
The only choice is to be done on which of the two pumps use, if the biggest or the smallest.
| Sicce syncra 1.5 | Sicce syncra 2.0 | |
| Water flow | 1.350 l/h | 2.150 l/h |
| Static head | 1,8 m | 2,0 m |
| Consumo | 23 w | 32 w |
| Lenght | 103 mm | 123 mm |
| Width | 46 mm | 85 mm |
| Height | 78 mm | 105 mm |
| Up for | Lower performance or bigger media |
Highest performance or smallest media |
| Energy consumption cost in Italy | 50,37 euro | 70,08 euro |
The LGMAquari advice is to use the smallest pump for medium or coarse materials, such as coral jumbo, such as the extra coarse ARM, and as the natural CaCO3 media, and leave the bigger pump for the ARM, the smallest CaCO3 media and calcium carbonate. Or to use the pumps to vary the performance of the reactor itself, and then bigger pump for high performance and smaller pump for lower performance. The difference in the use of either pump is about of € 20 for an annual average cost of electricity of 0.25 € per kwh. If we add to a cost the esternal pump, the annual cost increases of about 20 euro, bringing the total cost to 70 and 90 € respectively, obviously in Italy.
I think the idea of LGMAquari to include two recirculation pumps within its reactor has been great, in order to allow the user to choose. I had no doubts and I started immediately by choosing the smaller of the two pumps, the Sicce Syncra 1.5, as I loaded the reactor for 3 / 4 of natural CaCO3 media, because my tank, right now, is still not completely filled with hard corals as I hope it will be soon. I Saw how my tank reacted and I think that the use of larger pump is useful in very specific and sporadic cases, or for very large tank. I would you noticed that the volume difference of the two pumps is undoubtedly high, and so in a small sump the smallest pump is less complicated to manage than a more cumbersome pump. After more than four months of use I consider myself more than satisfied with how the reactor worked in my tank.
The filling material of choice for this type of reactor with cylindrical diffuser is undoubtedly the natural CaCO3 media of medium size or jumbo, do not recommend the use of materials such as ARM and very minute as calcium carbonate. In fact, in the presence of compact materials the diffuser would be unable to guarantee the stability of pH along the reactor column, with a considerable loss of efficiency, even if you use the most powerful of the two pumps. But you can avoid this problem, however, by using the coarser material.
After choosing the pump and placed the reactor inside sump we can connect the outlet pipe, bubble counter and check valve.
In this regard, I suggest you change the check valve with something more powerful, although in fact it works for its primary purpose, which is to allow or disallow the passage of CO2, the job is very dry, with very large bubbles and therefore more difficult to manually calibrate, in the case of use with a valve (as I do), the problem is only for purists (like me).
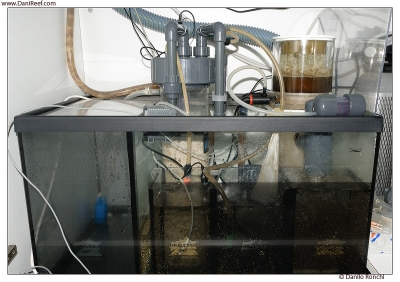
My sump and, on the left, the calcium reactor LGr701 SP
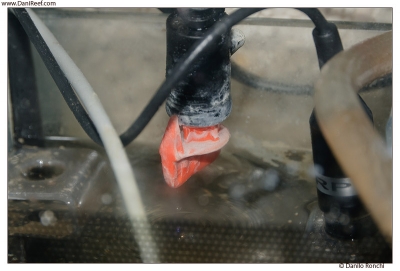
The tube output is provided with a plastic tap that if not maintained properly tend to become clogged. Take my advice, if possible, to remove the tap and use a clamp, much less critical in its operation. In any case cleaning the tube output is one of those things that should be made at least monthly.
The plastic tap after one month usage
During use, there were no problems at all, in four months of intensive use has never stopped and has always worked like clockwork, even with power outages, real or simulated.
How loading the reactor
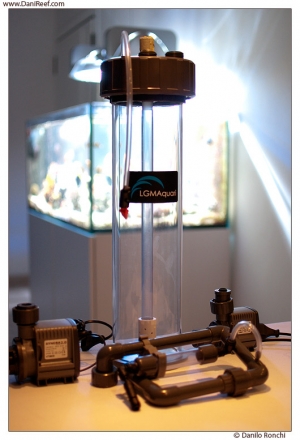
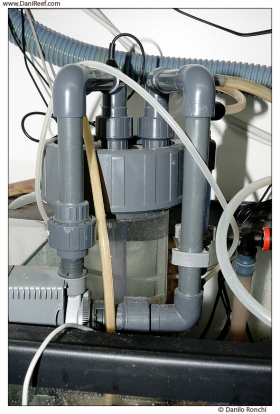
The loading of the material occurs, as in virtually all calcium reactors, from above. To proceed you need to unscrew the large PVC fitting that holds the cover and press on with an o-ring seals resting on the cylinder. The system is certainly leakage proof, but it becomes a bit ‘cumbersome when refilling of the material. In fact, to open it you should be able to hold the reactor in some way as you go to unscrew the reactor, which with my own small hands is never easy. At this point the upper block with pipes for recirculation pump will stay in your hand and you do not know where to place it. But is another problem common to most of the reactors. All amplified by the inconvenience of having a sump generally never large enough and contained in a cabinet. Apart from that the system is sufficiently secure and leakage proof, so as to allow a safe use of the reactor outside the sump itself. The downside, which in this case is a great advantage, the reactor can be completely dismantled and inspected with your hands, so you can clean it all the way to the bottom without much effort, a task that is advised to do at least once a year.
The large PVC fitting and recirculating piping. You can see also the small yellow pipe for enriched calcium water and the silicon tube for CO2
Manual setting
The adjustment of the reactor could be done manually by adjusting the number of bubbles of CO2 input through the pressure reduction valve balanced with drops in output from the reactor through a plastic tap.
I usually recommend starting with one bubbles of CO2 every two seconds and one drop per second as output. The management of CO2 will adjust the pH while management of the drops it will set the total balance. In order to properly calibrate the reactor will proceed to measure the values of Ca, Kh and Mg in the water before putting the reactor itself in the sump, then we will proceed to assembly and setting as referred above, or in any other way, then you should wait at least a day before making the second measurement, one in a tank and one just outside the reactor, to see if the contents of Ca and Kh is sufficient.
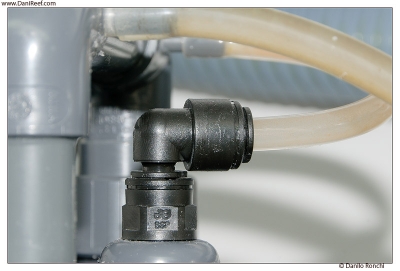
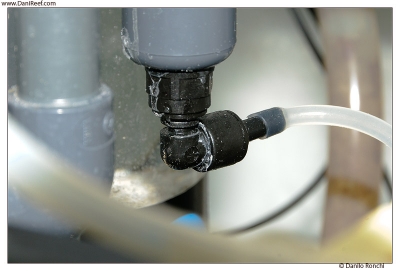
The John Guest push-fit fitting after the bubble counter
At this point we compare the output values from the reactor in comparison with those in the tank. To get a good efficiency, the reactor should have dKh greater than 30 outgoing, so if the second measure of dKH is lesser we need to increase the bubbles of CO2 entering, without adjusting the drops in output. We will wait for a day and we will do measurement again. Once the dKh will be greater than 30 (but 35 or 40 is good), we will compare the value of Ca in the tank measured before mounting the reactor and after mounting it. If the value has dropped it we need boost output, if the value is identical it’s okay, if the value is increased too much you can slightly reduce the number of drops in output. At this point we have a little problem, because varying the outflow varies the percentage of CO2 dissolved in the reactor, as with the same amount of CO2 we will have greater or lesser amount of water. We need therefore adjust slightly bubbles of CO2 in agreement with the increase or decrease the flow.
We need also to consider that with time our corals will grow and will need more calcium and so you need to occasionally recalibrate the reactor, also gradually the media inside reactor will consume and so the efficiency of reactor will decrease, to avoiding this I advice you to keep the reactor full or at least 3/4 full and refill it often.
The John Guest push-fit fitting before the bubble counter
Setting by pH probe and solenoid valve
To simplify the administration of calcium reactor, and to have a “better” result, it is possible to connect a pH probe, in order to handle the amount of CO2 into the reactor through a valve controlled by a pH meter.
In this way the probe will read the value inside reactor, and we can regulate our solenoid valve that allows the release of CO2 when the reading exceeds a certain value. In my case I set my Biotopus to dispense CO2 to above a pH of 6.20. With my natural CaCO3 media and this setting I have an output of about 670 ppm of calcium with a Kh of about 37. Quite adequate for most of the tanks up to 1,000 liters as stated by the manufacturer. The consumption of CO2 is not excessive, succeeding with 2kg of CO2 to use reactor for a time about 3 months. The greatest advantage using the probe is based on continuity of supply of calcium enriched water, which we’ll have also when media will go down, and above all we will avoid the overdose of CO2 due to the reduction of media inside reactor or changing in the pump flow. The only problem is to calibrate the pH probe which tends to give us slightly wrong reading after a relatively short time, say around 40/45 days, but this value must be adjusted on the basis of our experience.
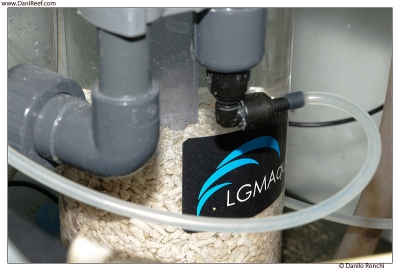
The natural CaCO3 media inside reactor
For those who would the best from perfect adjustment of the calcium reactor, we could also make the following assessment, specially for all reefers who have slightly problems with algae in the tank, which we know are stimulated by a low pH. Lowering the pH of the tank by the water coming out from reactor is a phenomenon that becomes critical in fact, especially at night, so thanks to solenoid valve and a timer, or a programmable computer, you could run the reactor only in the daytime, and blocking in the night the output by turning off the external pump power, while leaving the pump recirculation and the control of CO2 by solenoid valve. In this way we will avoid it could concur to lowering pH at night. The water in the reactor will be kept in circulation and CO2 would not be erogated because controlled by solenoid valve, so that we will not have any problems due to stagnation of water or excessive loading of CO2 inside reactor.
The noise
The noise is not a problem, as it is perfect average, in fact the reactor is quiet, because it would be difficult to make a reactor noisy, but you can hear the sound of the shattering of CO2 inside the recirculation pump. The only way to avoid the noise would be to send the CO2 into the circulation only after the pump, and not before, but this will lower the noise level but also dramatically decrease the efficiency of the reactor itself because the CO2 would not be mixed properly.
Conclusion
After more than four months of use I’m largely satisfied with this reactor, and I can therefore recommend it without reservation. Operation is flawless and excellent in all conditions. The possibility of regulation is great also thanks by the possibility to choose one of two recirculation pumps supplied, it is equipped with a probe holder for easy control via solenoid valve, it can recovery CO2 and therefore does not need anything to work at its best. The reactor is complete and ready to use, even if to get the best I would change the plastic tap with a more “ergonomic” clamp, which has far less problems with clogging and maintenance, and especially I would change the non-return valve with something more powerful, especially if the reactor will be used with manual calibration, where the regularity of bubbles is more important.
For my personal experience I think the LGMAquari LGr701 SP suitable for hard corals tanks up to 600/700 liters. When used in tanks with mixed corals or only soft coral it can handle tanks of double capacity without major problems, then we will only fill it more often.
Link to manufacturer’s website:


