In my story of aquarium keeper I had a chance to try two Calcium reactors Korallin, the C-1501 and C-3001. Both into two different tanks. The C-1501 on a tank of 300 liters and the bigger C-3001 on a tank of 400 liters. Both tanks were full of hard corals (sps). I’ve tried using both arm and natural CaCO3 media. And I must say I was largely satisfied by their operation.
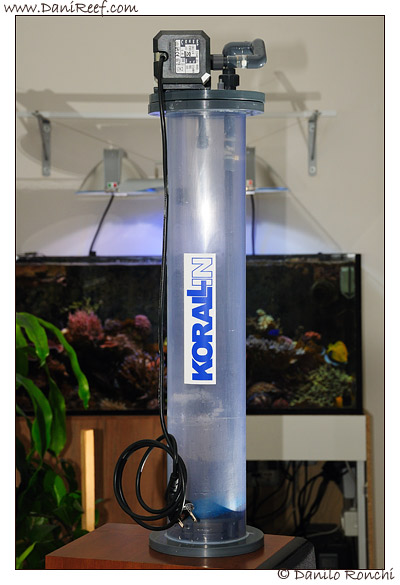
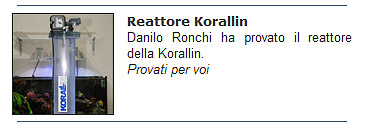
The photo shows the C-3001 Korallin just disassembled and cleaned by my aquarium. The plexiglass is certainly more opaque than when you buy new, but I would say that is not a big problem!
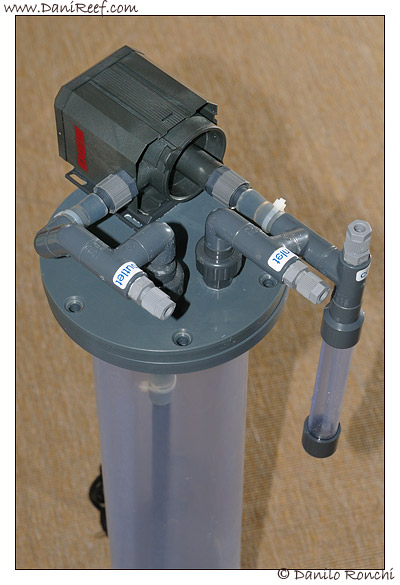
The two models are virtually identical, same pump and same diameter, what difference there is just the height of the filler pipe, so that the C-1501 looks like a pocket model, but this height has a huge impact on performance as we shall see later.
Caratteristiche tecniche:
| Korallin C-1501 | Korallin C-3001 | |
| Reactor height | 400 mm | 710 mm |
| Pipe Diameter | 110 mm | 110 mm |
| Base Diameter | 160 mm | 160 mm |
| Pump | Eheim 1048 | Eheim 1048 |
| Height free to fill | 240 mm | 550 mm |
| Capacity | 2 litres | 4,7 litres |
| Street Price (Italy store) | 302 euro | 365 euro |
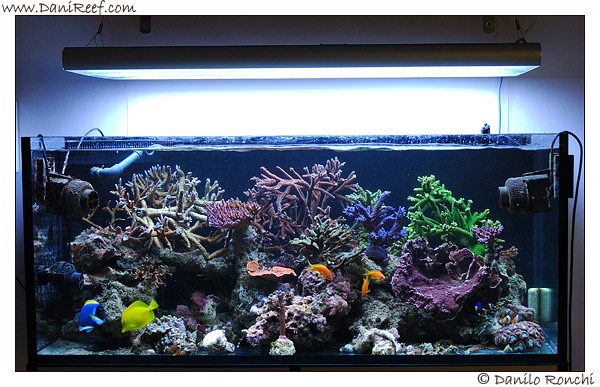
The difference in height of the column leads to a very different performance because the contact time between CO2 and the calcareous material is very different. In fact, in my experience with the 1501 I really struggled to maintain a calcium level around 380 ppm in my previous tank (300 liters) that you can see below:
While I used the C-3001 with my new tank, bigger (400 liters) where I mantained more than 450 ppm without any effort.
Obviously we can see the difference between the two reactors simply looking at the difference in height of the useful contact column, and not the height of the two reactors. The difference in capacity of the C-3001 is increased by 130% compared to 1501. More than double.
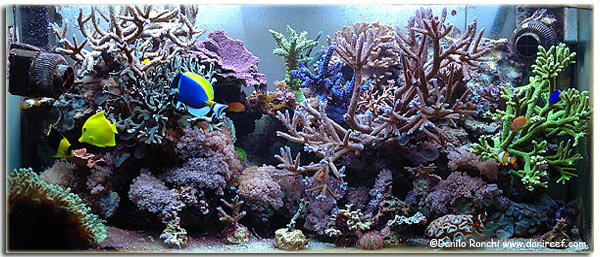
Despite all, the 1501 has proved very efficient in a tank completely full of sps as you can see in the photos above.
Now compare a photo of the two reactors into the sump … just to see the relative difference when compared side by side …
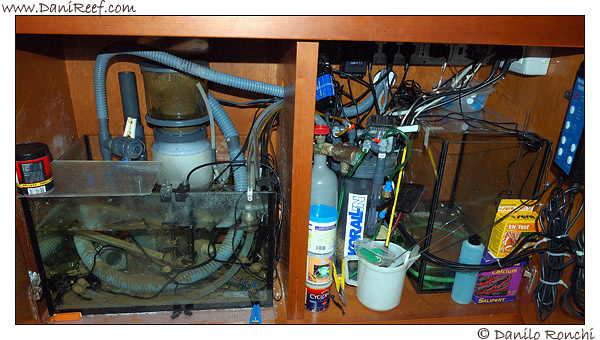
Korallin C-1501 |
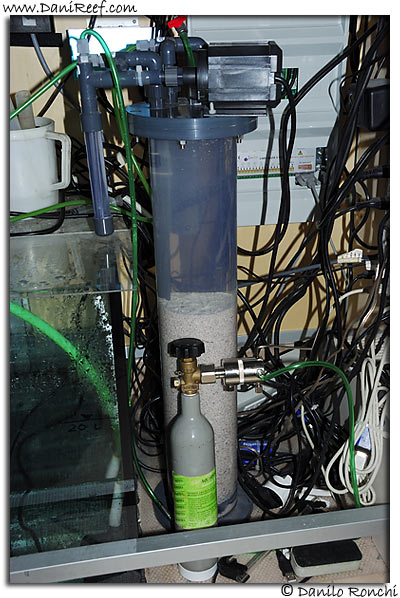
Korallin C-3001 |
Setting up
The reactor itself is easy to assemble. There is a sponge to put on the bottom to prevent the media inside the reactors could recirculate, then the pump should be set above it, and connect the two pipes in and out, which are easily marked with “inlet” and “outlet”. Moreover, we must connect the tube to the CO2 bubble counter and the valve (not supplied with the reactor).
The quality of PVC and the bonding is not particularly exciting, but certainly related to the price charged for the purchase. The installation manual is nothing more than a photocopied sheet and this is certainly not a pretty sight for anyone preparing for the first time to mount the calcium reactor in its tank without any experience. Certainly, the mounting of this reactor is very simple, but a better manual would have helped.
As seen in the picture all the tubes are very fast to connect, simply unscrew the plastic screw, squeeze the tube provided and tighten. In some cases I have preferred to seal the threads of the screws internally with Teflon to prevent drips.
The two top plastic parts, one connected to a PVC pipe and the other to tubes and pump, are spaced apart and connected through a series of screws. The screws are unfortunately subject to rust, which would certainly be unsightly but does not affect the operation that can’t create problems of water contamination by iron, since the screws will never touch the water.
This sealing system is however not easy to use when refilling as it is necessary to unscrew and pull out all the screws, rotate or remove the cap surface, although I prefer to rotate over the plastic pipe that brings water rich in CO2 in the bottom of the reactor, and then top up with suitable materials. Finally, it is necessary to return the top in the same position and ensure the cleanliness of the seal to prevent unwanted losses. Then screw the whole. The operation is not so simple and is definitely the worst part of this calcium reactor.
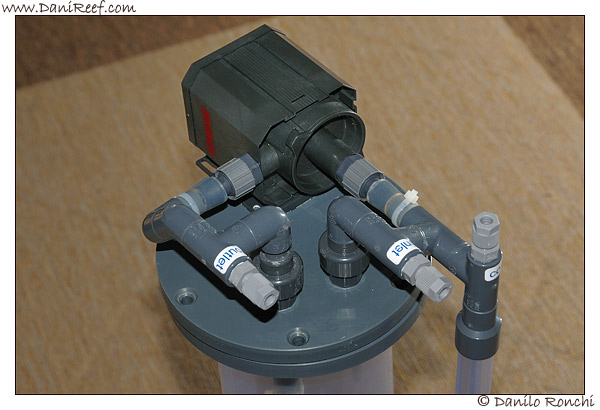
To let work a reactor of this type we needs an additional pump, not provided, or adding a T-connections on our return pump controlled via tap. The result is the same, while the consumption of energy should be lower in case management through diversion. I have used indiscriminately in both ways, and had no problems, although as I said I prefer a diversion from the return pump.
Manual setting
The adjustment of the reactor must be done manually by adjusting the number of bubbles of CO2 input through the pressure reduction valve balanced with drops in output from the reactor through a valve.
I usually recommend starting with a bubble of CO2 every 2 seconds and a one drop per second output. The management of CO2 will adjust the pH while management of the drops it will set the total balance. In order to properly calibrate the reactor will proceed to measure the values of Ca, Kh and Mg before entering the reactor itself, then we will proceed to the assembly and setting as referred to above, or in any other way, then you should wait at least a day before making the second measurement, one in a tank and one just outside the reactor, to see if the contents of Ca and Kh is sufficient.
At this point we compare the output values from the reactor in comparison with those in the tank. To get a good efficiency, the reactor should have dKh greater than 30 outgoing, so if the second measure of dKH is lesser we need to increase the bubbles of CO2 entering, without adjusting the drops in output. We will wait for a day and we will do measurement again. Once the dKh will be greater than 30 (but 35 or 40 is good), we will compare the value of Ca in the tank measured before mounting the reactor and after mounting it. If the value has dropped it we need boost output, if the value is identical it’s okay, if the value is increased too much you can slightly reduce the number of drops in output. At this point we have a little problem, because varying the outflow varies the percentage of CO2 dissolved in the reactor, as with the same amount of CO2 we will have greater or lesser amount of water. We need therefore adjust slightly bubbles of CO2 in agreement with the increase or decrease the flow. We need also to consider that with time our corals will grow and will need more calcium and so you need to occasionally recalibrate the reactor, also gradually the media inside reactors will consume and so the efficiency of reactor will decrease, to avoiding this I advice you to keep the reactor full or at least 3/4 full and refill it often.
To simplify the administration of calcium reactor it is possible to buy a cap that includes a possibility to insert a probe, to be able to connect a pH probe, in order to handle the amount of CO2 into the reactor through a valve controlled by a pH meter. In this way the management is apparently simpler, but hides pitfalls. First of all you need to calibrate the pH probe very thick (about 1 time per month for best results and to replace it every 2 years) because they tend to loose their calibration, it is also necessary to include in our management one valve and one pH controller having both cost of purchase, management and time. I however have always used the two reactors manually for over two years without any problems.
I must also point out that the efficiency of both reactors is very high, since the amount of CO2 used was always quite low in comparison to other reactors on the market.
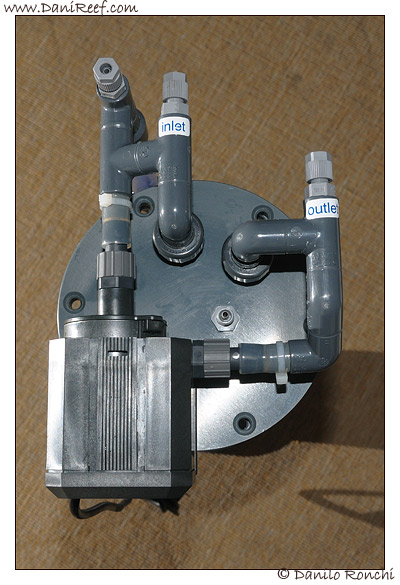
The pump Eheim 1048 is characterized by a static head of 1.5 meters, a flow-rate of 600 liters/hour and a consumption of 10 watts. That translates into an estimated annual consumption equal to 87 kwh than doubled to take into consideration the cost of an external pump, is around 180 kwh. All in all, more than acceptable.
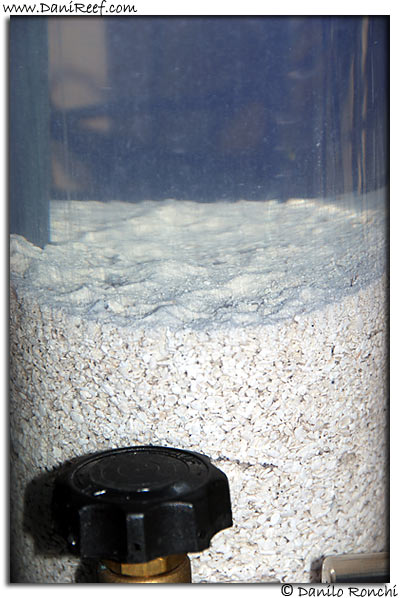
The filling material of choice for this class of reactors, which are not fluidized bed, and do not have a strong internal movement, is surely the classic reef material that is alos supplied when you purchase the reactor, to simplify the management at the time of purchase. I also used fine-grained ARM and a medium grain ARM, and I must say that with all three media the results are optimal, but with the ARM fine-grained when the filler pipe begins to empty you notice a package material with complete closure of the reactor and CO2 formation in the column. as you can see in the picture below where the ARM was compacted fine-grained and it was not possible to operate the reactor without intervening.
The reactor has not the recovery of CO2 and therefore can be made inside a bubble of CO2 that will be positioned under the cap, and could increase in size until reaching the tube of recirculation. In this case the reactor is stopped because the CO2 enters the pump that will go into cavitation. And ‘Just open the little tap in the upper central place to vent out the CO2 excess and return to proper functioning. The next step will obviously decrease the bubbles of CO2 input (too many bubbles in relation to water and the material treated), or a slight increase in water outlet from reactor.
Apart from the problem of filling the column with CO2, with this system adopted the CO2 will never be dispersed in the tank and could not amplify in the case of a power failure as the CO2 would continue to enter the reactor, which would instead pump stopped. The reactor does not suffer the short power outages and is always ready to use. Obviously in case of long power outages and manual management without valve could happen that the CO2 released into the reactor is such as to create a bubble that arrives at the recirculation tube, not allowing the reactor to begin to work.
Conclusion
I think the two calcium reactors seen in this review are excellent value for money. The cost of the reactor is low, as well as lower the operating cost from electricity used and CO2. The setting is fairly simple, although it is often necessary to control the nozzle of a leakage of water as it tends to clog, another problem common to all calcium reactors. The unique way to decrease the problem of blocking is to increase the output flow, or using a peristaltic pump as power, a situation not recommended due to potential problems in case of obstruction of the system.
Unfortunately, it is necessary to point out that the reactor does not have the recovery of CO2 and so even if equipped with high efficiency, in the case of a wrong adjustment would be release CO2 into the air, also it is not possible its management by valve if not buying a cap sold as an option, nor can you use it in manual but with a probe inserted, useful for checking the correct functioning without automating its use.
The most negative is, however, the filling system, which is the most uncomfortable we may have.
I think the Koralline C-1501 suitable for tanks full of hard corals (sps) up to 250 liters, and the C-3001 suitable for tanks up to 500 liters. When used in mixed tanks or tanks of only soft corals can be handled tanks double capacity without major problems.
The article was published on Magazine Acquaportal in the month of September:





Hello Dani,
Nice Calcium reactor. Did you manage to fix your tank silicone problem?
I’m waiting for the Red Sea underwater pics!
Regards from Portugal,
Ricardo Rodrigues
Hi Ricardo
Yes I fix it! I buy another tank I’m waiting for…
The pics are almost ready, I’ll publish them, I think, during the next week, stay tuned!
Thanks
[…] writing in the last month of two calcium reactors Korallin C-1501 and C-3001, I am going to review another calcium reactor, the Elos REA120 Plus. With this reactor, I have […]